Skip to content
How to set up the Shelly Smart Plug

How to set up the Shelly Smart Plug

Prerequisites

Before starting, ensure that:

  • Home Assistant is running on your system.

  • You have access to the Home Assistant dashboard.

  • You have the Shelly Plug ready to set up.

Setup

Connecting your Shelley Plug to the network

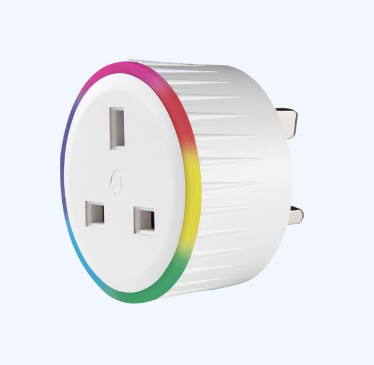
1. Plug in the Shelly Plug UK into a power outlet.

2. Download the Shelly app on your phone (if you don’t already have it).

Link to Shelly App Download

3. Tap the + icon to add a new device.

4. Then add via Wi-Fi or Bluetooth, it will then automatically search for your new plug. 

5. Then follow the instructions to connect the Shelly Plug to your local Wi-Fi network.


Integrating Shelly Plug with Home Assistant

Once connected to your network, you now need to integrate it with Home Assistant.


1. Open Home Assistant Dashboard

Begin by navigating to your Home Assistant dashboard. From here, go to Settings.


2. Under Settings, select Devices & Services.

3. Add Shelly Integration

In the bottom right corner, click the + Add Integration button.


4. Search for Shelly

In the search bar, type "Shelly" and select the Shelly integration from the list.

5. Finalising the Integration

A discovered shelly plug should appear, simply click on submit and it will be automatically added to your dashboard.


Using Shelly Plug in Home Assistant

Once these steps have been completed, you can start using the Shelly Plug in your Home Assistant environment. The plug will have been automatically added to your dashboard, you can now:

  • Turn the plug on/off remotely.


    • Monitor power consumption of devices via your plug.


      • Use your device to set up new automations.

      Previous article Unlocking your home assistant dashboard
      Next article How to Configure a Zigbee Door and Window Sensor in Home Assistant with ZHA

      Leave a comment

      Comments must be approved before appearing

      * Required fields

      See More

      • Choosing the right Home Assistant Server: HAS-B1, HAS-B2, or HAS-H3

        Choosing the right Home Assistant Server: HAS-B1, HAS-B2, or HAS-H3

        We stock a large range of Home Assistant servers that come pre-installed with Home Assistant OS. Each machine is hand-picked to provide reliable, local smart home control with silent, fanless operation. Below, we compare the specifications of each model so you can decide which one is the right choice to run your Home Assistant server on.

        Read now
      • Matter vs Reality: What Home Assistant Users Should Know

        Matter vs Reality: What Home Assistant Users Should Know

        You’ve probably heard of Matter — the new smart home standard backed by Apple, Google, Amazon, and others. It promises to fix compatibility headaches by letting all your devices talk to each other, regardless of brand or ecosystem.

        Sounds great. But if you’re already deep into smart home setups — especially with Home Assistant and Zigbee — you might be wondering: is Matter even relevant to me?

        Read now
      • Are Smart Home Products Effective at Saving Energy Over Winter?

        Are Smart Home Products Effective at Saving Energy Over Winter?

        Winter is when energy bills hit hardest — and it’s also when smart home technology proves its real value. While no single device is a magic fix, the latest research shows that well-designed smart heating systems consistently help households cut waste, improve comfort, and make heating far more efficient during the coldest months.

        Read now

      Compare products

      {"one"=>"Select 2 or 3 items to compare", "other"=>"{{ count }} of 3 items selected"}

      Select first item to compare

      Select second item to compare

      Select third item to compare

      Compare