
WLED gives you full control over addressable LED strips with smooth animations, custom colours, and instant responsiveness — all running locally on an ESP32. Pairing it with the WLED WiFi Remote gives you physical control from anywhere in your home without needing the app.
This guide walks you through setting up the DOMRAEM ESP32 LED controller, connecting it to WLED, pairing the remote, and getting everything running smoothly. Not only this but you can even add it to your Home Assistant setup allowing clean and easy automations.
What You’ll Need
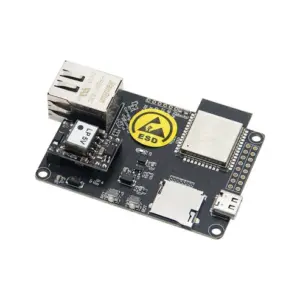
- DOMRAEM WLED LED Strip Controller ESP32
- DOMRAEM WLED WiFi Remote (optional)
- 5V or 12V addressable LED strip (WS2812B, SK6812, etc.)
- Appropriate power supply (5V or 12V depending on strip)
- Phone or laptop on 2.4GHz Wi-Fi
- Home Assistant (optional)
Step 1 — Wire the LED Strip to the ESP32 Controller
- Connect LED +5V (or +12V) to the controller’s V+ terminal.
- Connect LED GND to the controller’s G terminal.
- Connect LED Data In to the D output terminal on the controller.
- Power on the ESP32 controller using any of the appropriate methods.
Tip: Make sure the LED data wire goes to DIN, not DOUT — reversed strips won’t light.
The ESP32 will now start broadcasting a Wi-Fi network named:
WLED-XXXXXX
Step 2 — Connect to WLED and Configure Wi-Fi
- On your phone/laptop, open Wi-Fi and join the network WLED-AP. If there is no AP network, hold the Opt button for 10 seconds to enter AP mode.

- A captive portal will open automatically. If not, visit: http://4.3.2.1

- Enter your Wi-Fi SSID and password then save.

- The controller will reboot and join your network.
To find it again:
- Check your router’s connected devices list, OR
- Use wled.local in your browser or use the WLED app, OR
- Check Home Assistant (it auto-discovers WLED) and click visit device
Step 3 — Pair the WLED WiFi Remote
The WLED WiFi remote works by sending HTTP/MQTT commands to the local WLED controller.
Pairing the Remote
- In the WLED menu, move to Config -> WiFi Setup
- Enable ESP-NOW Wireless, then click “Save & Connect.
- Long press any button on the WLED remote control for at least 5 seconds, and then go back to “WiFi Setup”
- At the bottom of the page copy the string after last device seen and put it in “Paired Remote MAC”, then press “Save & Connect”. If there is no string, just refresh the page.

- After it resets the remote should now function properly.
Your remote should now be able to:
- Turn the LEDs on/off
- Change brightness
- Set colours
- Switch presets
- Trigger effects wirelessly
All locally — no cloud involved.
Step 4 — Optional: Add WLED to Home Assistant
Home Assistant automatically discovers WLED.
- Go to Settings → Devices & Services
- Find the card that says WLED, it should have autodiscovered.
- Click Add, follow the steps to finish setup.

- You will now be able to control all the feautres of the LED via Home Assistant.

You now have:
- On/Off control
- Brightness
- Effect selection
- Trigger-based scenes (motion → LED on, etc.)
FAQs
Yes — everything works locally, including the remote.
Any addressable strip such as WS2812B, SK6812, WS2815, APA102, and more.
Most 5V strips work directly with ESP32 data output, but long cable runs may need a level shifter.
Yes — if the controller supports multiple outputs, WLED can drive each one.
Make sure WLED is connected to Wifi correctly, restart HA aswell. To check the device is online you visit http://wled.local.
Press the reset button on the ESP32, hold the button for 5s to force AP mode, power-cycle the controller.